Frame Me Up (Puzzles with a Frame)
Howdy, puzzlers! Here we are in March already if you can believe it. The days are getting longer, the weather is warming up, and here in New York City, we’re gearing up for another season of outdoor dining, city strolls, and spring flowers.
For me, It’s been a bit of a slow winter for puzzling, somewhat atypically. Usually in the cooler months I find myself quite naturally holed-up with a puzzle, furiously pushing pieces into place, but for some reason the impulse to puzzle has been a bit dimmer with me so far in 2024. One of the things that’s keeping me going, though, and keeping me excited about diving back into puzzling, is the notion of fulfilling my goals to try some new and different puzzles this year.
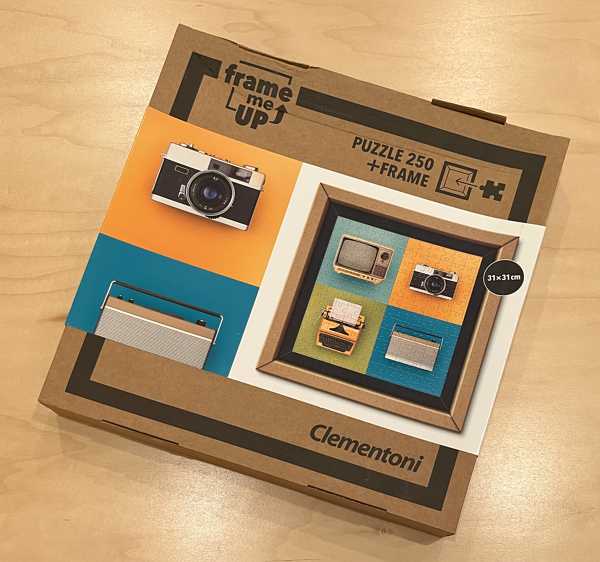
Since I was selected as an ambassador for Puzzle Warehouse back in late 2022, I’ve been excited to try this particular line of puzzles, the Frame Me Up puzzles by Clementoni, and I’m glad to finally have the chance to give them a go.
I could have sworn I had tried Clementoni puzzles before, but it turns out I haven’t. I really loved the idea of puzzles that “frame themselves” as soon as I saw them, and I was particularly drawn to one particular image from this collection, entitled Vintage Electronics (250 pieces). I know it’s a bit pretentious, but I still love analogue technology. A few years ago, I tried getting back into film photography, and it still brings back nostalgic memories of my parents using a typewriter to write letters and work projects when I was growing up.
I was also eager to try One Way, another 250-piece puzzle in this series, which features an image of Park Avenue and the Empire State Building in New York City. I love this image with its brick buildings and clear sky that makes me think of walking the city on a clear, crisp spring day. This ended up being the puzzle that I decided to start with.
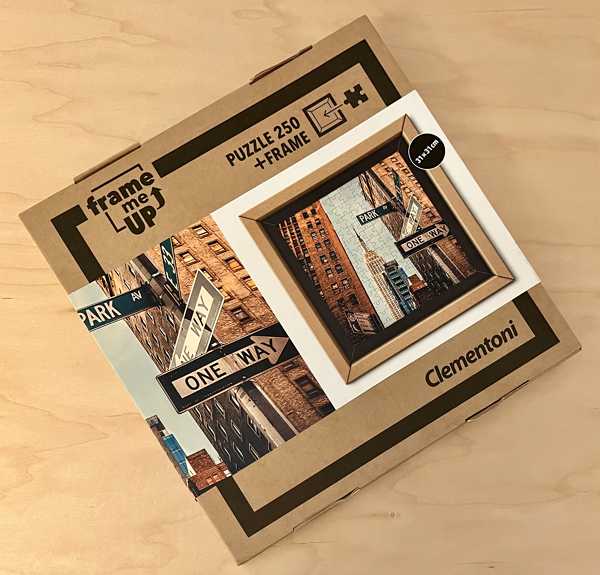
One of the things I like about these particular puzzles is the simplicity of their box design. Once you open up the box, you quickly realize that the puzzle’s outer layer is not meant to be kept. Once you put the puzzle together, at least part of the packaging itself will become one with the puzzle itself, and the box can basically be discarded, since it won’t be terribly easy to disassemble and redo the puzzle without damaging the frame portion.
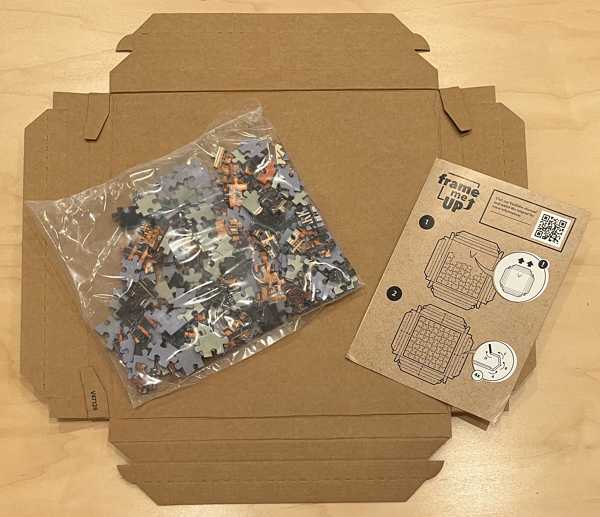
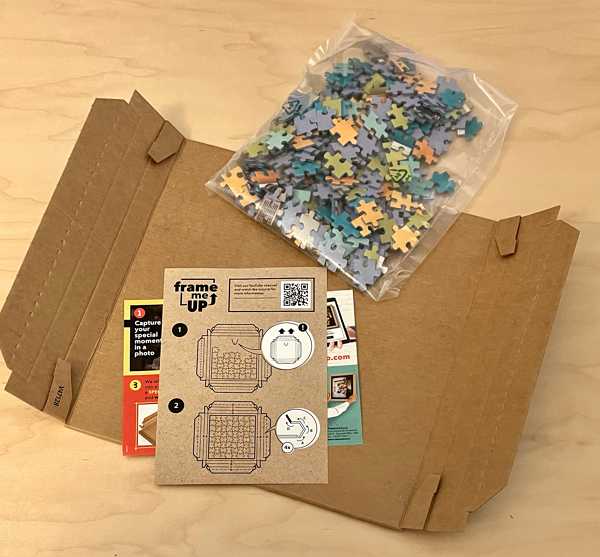
Inside the outer cardboard box, there is a bag of pieces and an instruction manual, which also includes a QR code to access an instructional video to help with assembling the frame portion of the puzzle.
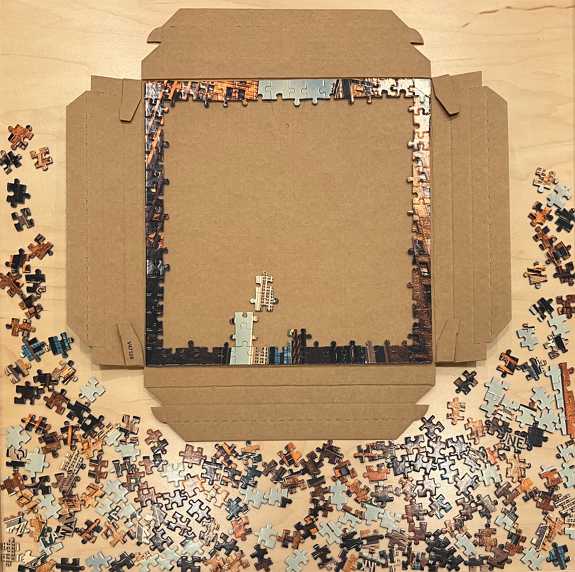
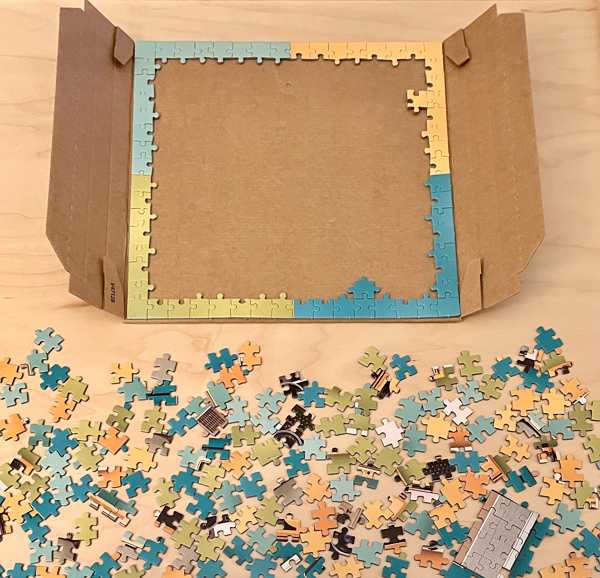
The basic gist is that you start by assembling the puzzle atop a cardboard mat that’s included within the outer packaging. You should be careful to make sure the puzzle is oriented so that the top of the puzzle aligns with the cardboard wall hanger which faces upward. That way, once you’ve finished and have put together the frame portion of the puzzle, you will be able to hang it right-side-up. I went ahead and put together the border of the puzzle first.
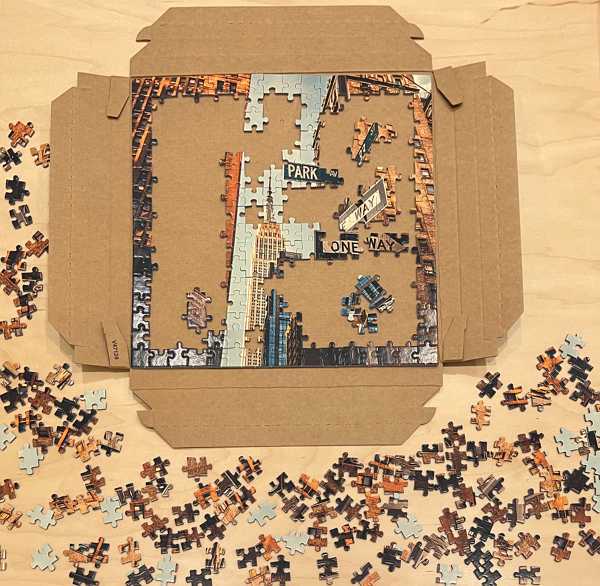
Considering this puzzle was only 250 pieces, I found this image to be a little more difficult than the ordinary small piece-count puzzle, but it wasn’t so tricky as to be frustrating. Focusing on the borders between colors (sky and buildings, signs and sky, etc.) helped a lot.
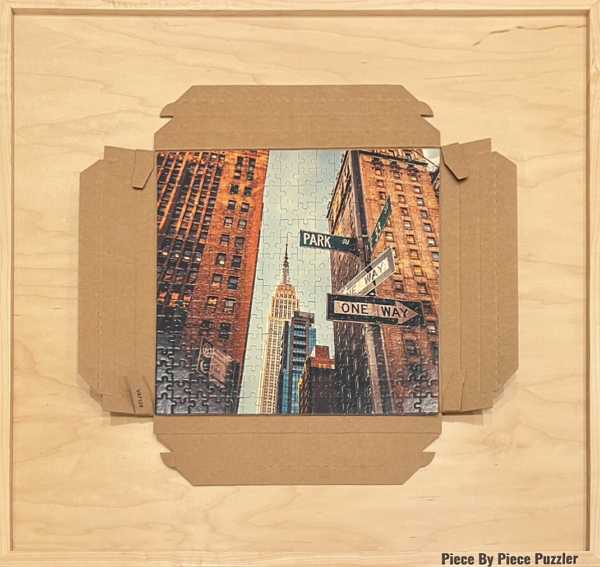
Finishing the puzzle itself presented its own satisfaction. I really enjoyed this image. I find that I often quite like puzzles with repeating architectural features. It’s something about brickwork and street signs, and sleek lines that I respond to.
Next, I assembled the frame portion of the Frame Me Up puzzle. Unfortunately, I wasn’t able to capture a great progress shot for this puzzle, but it’s partly because the process doesn’t lend itself too well to visual representation. Basically, there are some ridges on the outer cardboard flaps of the puzzle surface which need to be folded in specific directions so that the inner matte and the outer cardboard frame can slot into place around the central puzzle artwork. Trying this with just the manual admittedly confused me, so I ended up watching the video using the QR code on the instruction manual, and watching the process through one time definitely helped with my assembly of the frame. I can’t say I followed the instructions exactly step by step, but I was able to figure out how to slot the various tabs into place to make the frame come together.
On the back side of the frame, you can see the cut-out tab that allows you to hang the puzzle on your wall using a traditional wall hook.
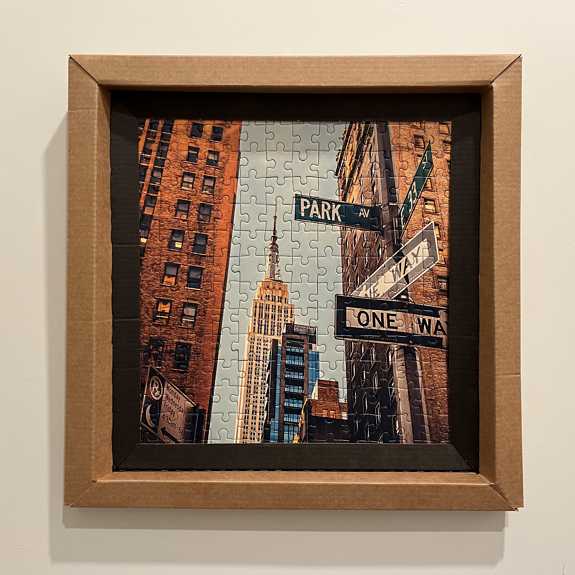
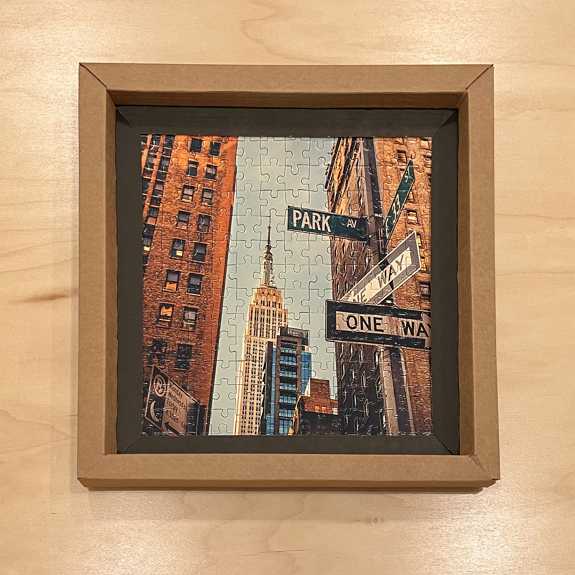
And here’s the final framed puzzle up on my apartment wall. Though the cardboard frame is pretty basic in terms of its quality, I think the finished product looks quite smart and would be fun to display.
Vintage Electronics by Clementoni
Once I finished the first puzzle, I moved on to the one that I had been eyeing, Vintage Electronics.
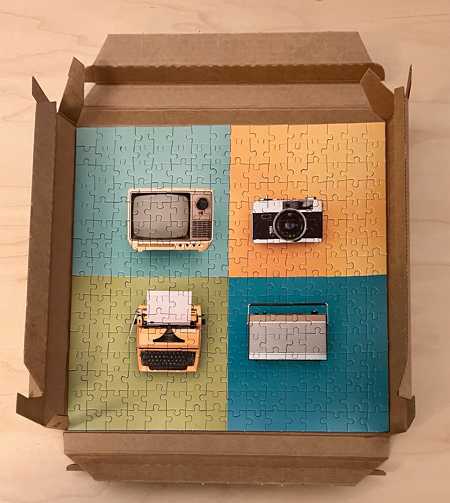
As expected, the contents of the box were the same.
And, once again, I started with the border of the puzzle. I had anticipated, and rightly so, that this puzzle would be easier, because the image is separated into four quadrants featuring bold and distinctive colors.
It was fun to pick out the pieces with bits of electronics on them and put together the analogue objects first.
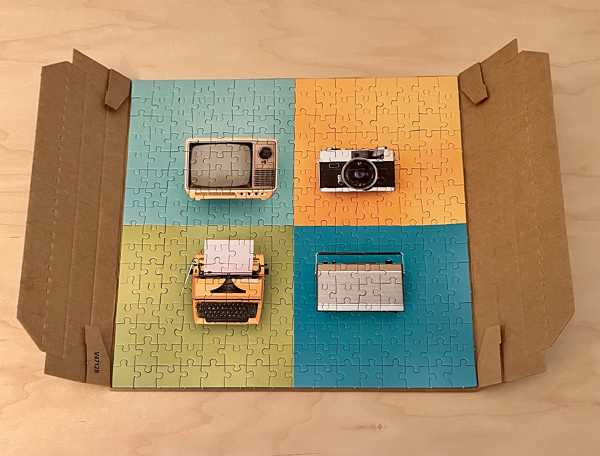
Then I filled in the rest of the colorful pieces and finished up the puzzle itself.
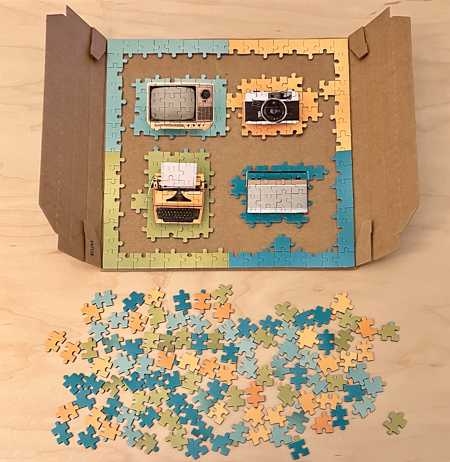
Here is the best progress shot I could get of the border of the puzzle mat folded up as it was being prepared to be folded into its frame formation.
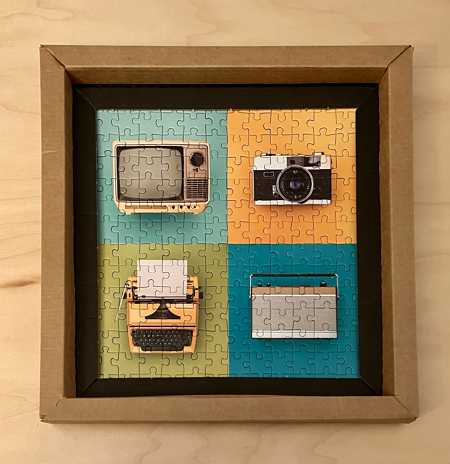
And here’s the finished puzzle in its assembled frame. I really like the colors and theme of this one, and I also think that these two Frame Me Up puzzles look quite cool together – they very much look like they would fit in within an urban apartment.
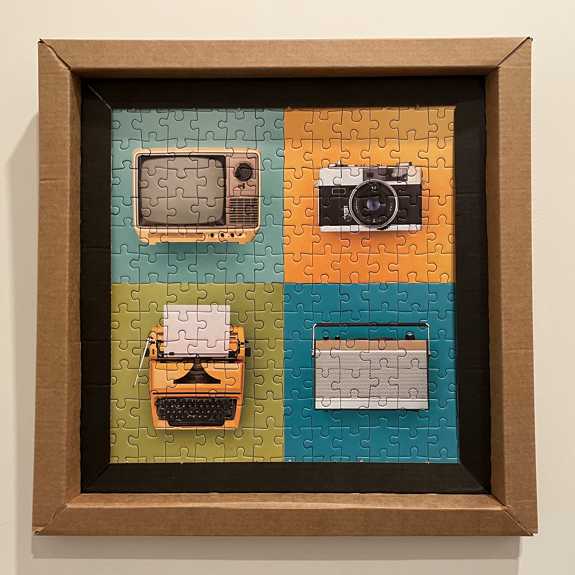
Vintage Electronics by Clementoni
As with the first puzzle, I had to hang the finished product on the wall to get the full effect. Once again, looks great!
Overall, I really enjoyed the process of trying these Clementoni Frame Me Up products. Putting them together was fairly easy with the help of the guide video, and I think the finished framed puzzles look quite smart. Because the frame is fairly simple cardboard, these puzzles aren’t exactly built to stand the test of time, but as I was thinking back on my early days in NYC it occurred to me that these framed puzzles would have looked great in a dorm room, or on a bookshelf at home along with some other apartment décor. One thing to be aware of is that the puzzle is not bound together by any adhesive, so if you tip over the puzzle and shake it, it very well might come apart. However, the pieces interlock quite well, so during my fairly ordinary handling of the finished product I wasn’t able to observe any of the pieces coming apart.
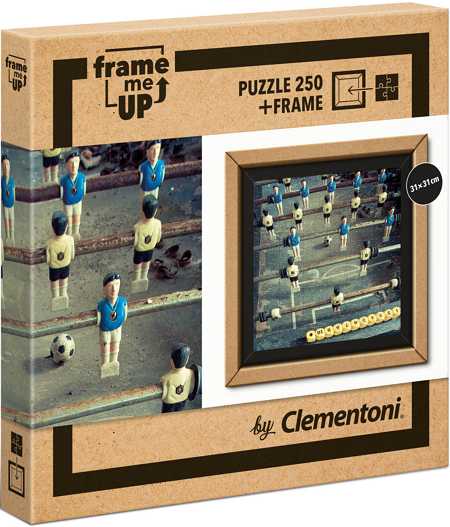
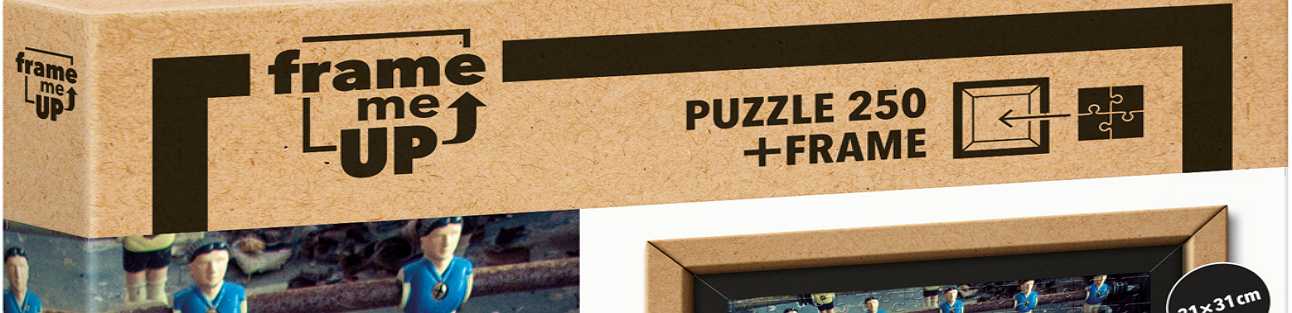
In addition to the two puzzles I did for this blog, Puzzle Warehouse also carries a third Frame Me Up Puzzle, called Foosball, which is also 250 pieces.
I think Clementoni has done a really nice job curating some trendy images that look good in this format, and I think if you’re looking for something unique to try this year to spice up your puzzling and get out of a rut, as I had been, these fun – and low-stress – puzzles could be just the ticket! And, well, if you disagree and want to blame me for it, I’m willing to take the fall, though I can’t promise I won’t claim that I was framed. Oh, god, not another bad pun…has this become a running theme? I guess at this point you’ll have to wait and find out next month!
-Richard (@piecebypiecepuzzler / YouTube channel: Piece By Piece Puzzler)